
If you’re after a few ways to keep the kids entertained this festive season, check out our crafty ideas for DIY Christmas Gifts – a functional and fun way to bring some cheer this year!
Reindeer Chocolate Jars 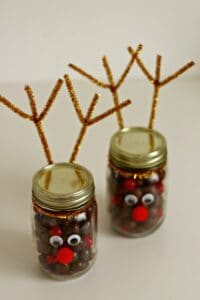
What You Need
• Glass jars
• Maltesers / other chocolate coated lollies
• Jaffas
Method
Fill your jars with the Maltesers and other chocolate coated lollies – don’t forget to mix in a few Jaffas to add a pop of colour. Seal the jar with the lid.The next step is making your reindeer’s face. Using your hot glue (this step requires parental supervision or help for younger crafters), glue your googly eyes onto the jar about a third of the way down from the top. Then, glue your reindeer’s nose on – we’ve chosen red pom poms to make ‘Rudolph’. Glue on the googly eyes, and the red pom pom as Rudolph’s nose.
To make the antlers, grab two pipe cleaners and cut them in half. Now lie one piece over the other, in the shape of a cross. You will then twist the horizontal pipe cleaner around the vertical one a few times to secure it, before bending the ends up to look like antlers. Repeat this till you’ve got two antlers for each jar.
To secure your antlers to the jar; grab another pipe cleaner – wrap it around the top of your jar and add an extra 3cms before cutting the pipe cleaner to size. Now, add your antlers – by wrapping the bottom of the stem around the ends of the new pipe cleaner (leaving about 2cm from each end). Finally, wrap the pipe cleaner with the antlers attached around the rim of your choccy-filled jar, overlapping the two ends at the back. Twist these ends together to secure it in place. Then simply fold the ends back, so you have no bits poking out.
Candy Cane Sled Gift Boxes

What You Need
• Small cardboard / jewellery box
• Candy canes
• Christmas lollies for filling
• Double-sided tape
• Glue gun and glue sticks
• Wrapping paper / Christmas ribbon
• Googly eyes
• Medium red pom poms
• Gold pipe cleaners
• Glue gun and glue sticks
Method
Find a small box (about 8 – 10 cm long) to act as your body of the sled / treat holder. The length will be determined by the size of your candy cane and the hook on top. See the images for how you want the box to be positioned on your candy canes to give you an idea for the size you will need. You may want to measure this length with a ruler first to find a box that fits perfectly.
Then, completely cover your box in wrapping paper or ribbon (or both) using double-sided tape. Now using your glue gun (with a parent’s help), attach your candy canes under the two longest sides of your box, with the hooks facing up. Remember to keep your candy canes wrapped in their plastic. You can add some ‘handles’ to the back of the sled, by cutting the stem of a candy cane into two parts and then gluing to the box (as pictured). This step is optional.
Now fill with candy and other goodies you’d like to gift. There you have it – a simple DIY Christmas gift for everyone in the family.
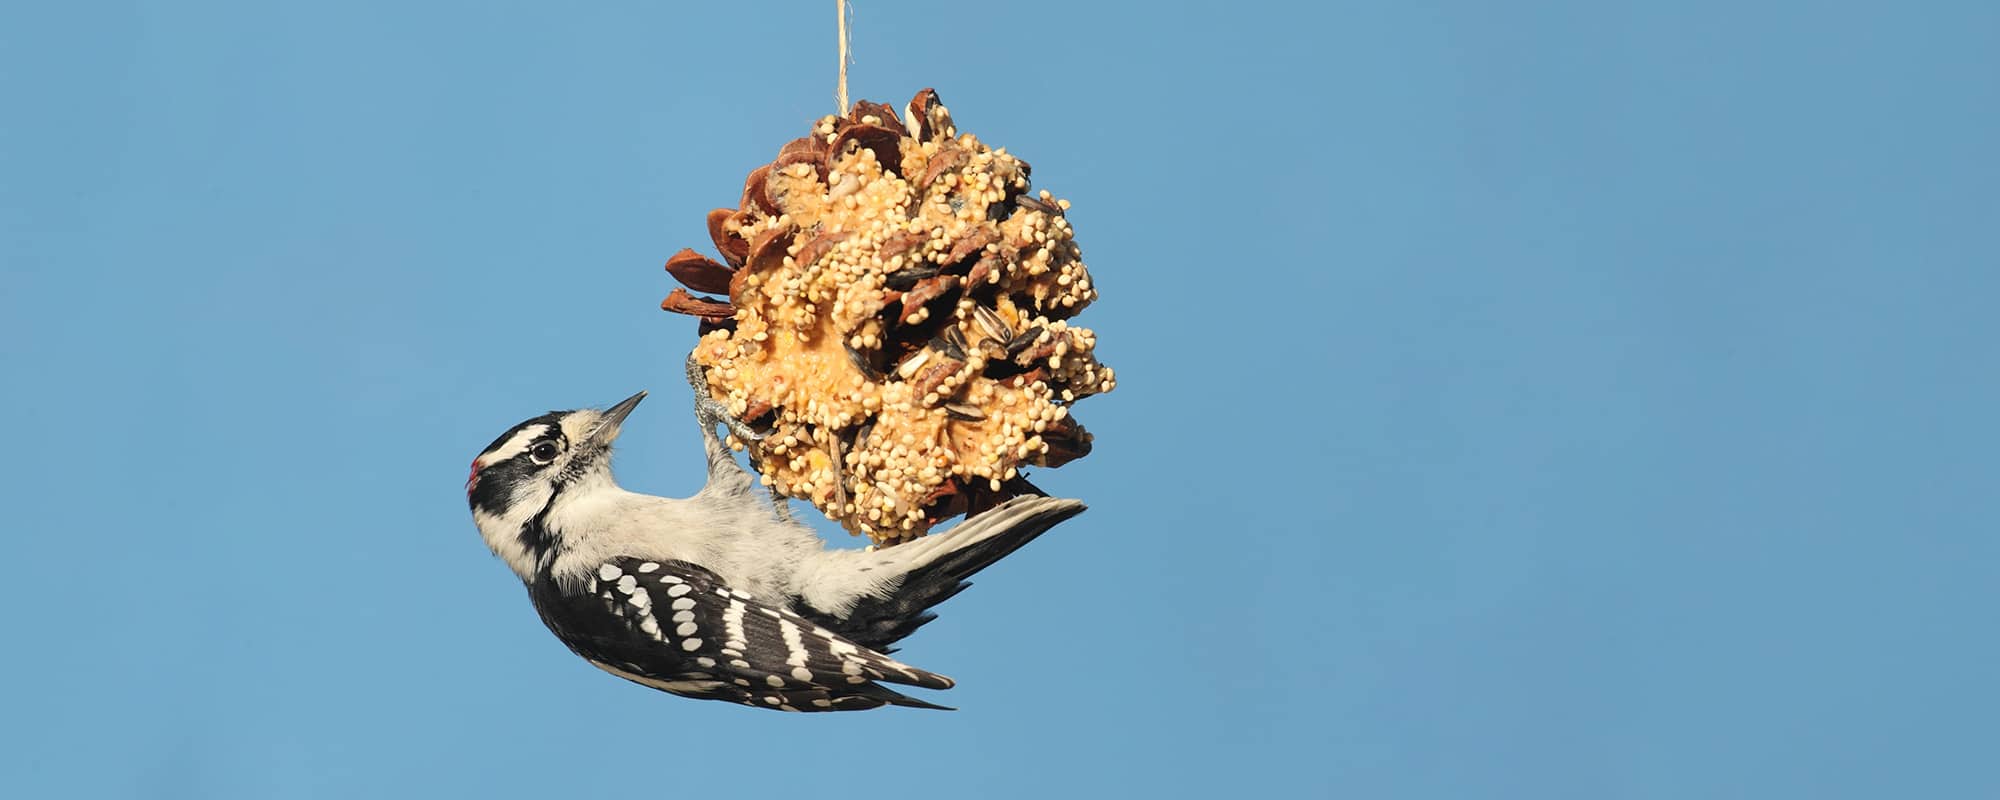
Pinecone Bird Feeders 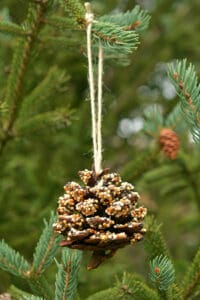
What You Need
• Large open pinecones
• Twine
• Peanut butter and butter knife
• Birdseed
• Bowl
Method
Next time you head up to the Tablelands, have a scout around for some pinecones, they make perfect little feeders for our tropical birdlife. Start with tying some twine around the top of the pinecone, ensuring you’ve got plenty to spare when it comes to hanging it up. You want to do this step first, or your hands will get super sticky after coating your birdfeeder in peanut butter and birdseed.
Now’s the messy part, grab your peanut butter and start spreading it onto the top of the pinecone’s scales. Do this until you have peanut butter on every open scale. Fill a bowl large enough to fit the pinecone in comfortably with birdseed. Dip the pinecone into the birdseed, making sure all the peanut butter gets covered and there’s plenty of treats for the birds.
Find a good spot to hang it; it can be on the deck or in a tree, but make sure it’s out of the reach of any pets. Then enjoy watching as it attracts the local flocks.
Pom Pom Cactus
What You Need
• Wool in various colours (depending on what colour you want your cactus to be)
• Scissors
• Mini terracotta pots
• Glue gun and glue sticks
Method
Let’s make pom poms! Start by making the larger pom poms for the main body of the cactus. Pick a colour and start wrapping the yarn around four of your fingers 200 times.
Now, with some assistance, remove the wool from your fingers and using a piece of wool (in the same colour) tie it off in the middle. Make sure it’s super tight and secure. You can now cut the two looped ends in the middle, which will make the yarn spring into a pom pom.
Repeat and make smaller pom poms to use as flowers or branches on larger cacti. You’ll only need two fingers to make the smaller ones, wrapping the wool around your fingers 50 times.
Once you’ve got the pom poms at the ready, do a dry run and trial how you’d like to arrange them, and how they best fit in the pot. Once you’ve decided on your design, grab the glue gun and add glue to the inside rim of your pot. Add your ‘cactus’ pom poms.
Now you can add the pom pom ‘flowers’, but be careful to not use too much glue. To tidy them up a bit, trim around the scraggly bits of wool, you can add more shape to the cacti like this also. And there you have it, a cute little pom pom cactus to gift to your family and friends.