

Nature play is a type of play that incorporates natural elements such as sand, soil, rocks, trees, plants, water and other elements found in nature. It is important because it helps children develop physical, cognitive and social skills, such as problem solving, creativity and cooperation, as well as a deep connection to nature and appreciation for the outdoors. Try out these craft activities with your child so they can get in touch with nature and bloom.
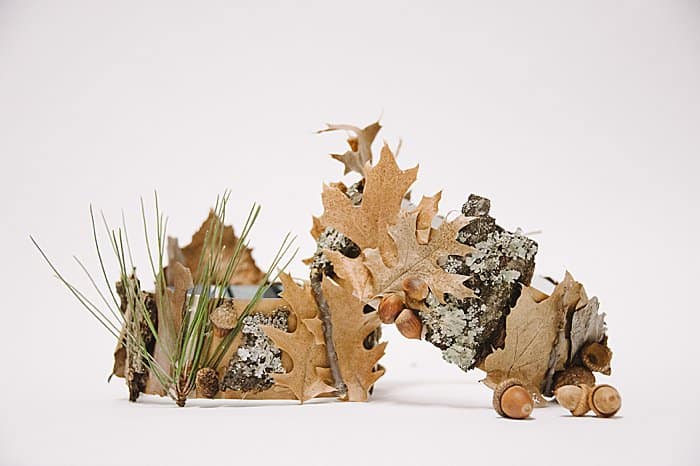
Nature Crowns
What You Need
- Lots of twigs, ferns, bark and gumnuts found in nature
- Paper for the crown’s base
- Glue gun
- Silica sand (optional)


Method
Create the base of your crown by wrapping the paper around your head. Mark where the paper joins, you may need to ask for help. Cut off any excess paper and then cut the paper in half. Gather twigs, ferns, bark, gumnuts and anything else you find in your garden that you would like to have on your crown.
Preheat your hot glue gun and plan out your crown’s design. Layout the paper which will be the base of your crown. Carefully apply glue to your gathered nature goodies and glue them onto the base. Wait for the glue to dry.
Once your glue has dried you can now form your crown by glueing the ends and connecting them together.
For a crown that has more longevity, you can purchase nature items made of long lasting material or dry out your ferns and flowers. Air dry your ferns and flowers by stripping them of excess foliage, cut the stems to your desired length. Hang them outside and upside down to dry. This process will take about two to three weeks.
Make your ferns and flowers last even longer by preserving them. Put a cup of silica sand in a container. Add your ferns and flowers to the container and seal it with the lid. Leave for about a week and they will dry out. For the impatient, follow the steps with a microwave proof container. Use another container filled with hot water and place them in the microwave side by side. Microwave for 30 seconds and then leave for 24 hours so your ferns and flowers dry out completely.
Butterfly Nature Weavings
What You Need
- Cardboard
- Pencil or pen
- Scissors
- Ruler (optional)
- Rubber bands
- Flowers or silk flowers

Method
For the first step, draw a butterfly outline on your cardboard or trace a printed out picture. Carefully cut along the outline. Mark where you will cut small slits as shown in the picture. A ruler may help you align the slits. Cut out the marked areas to create the slits. You now have made your weaving board.
Gently tie your rubber bands onto your weaving board as shown in the picture.
Gather your flowers from your garden or when you go out for a stroll, be sure to ask your neighbours if you are taking them from their garden. For long lasting flowers purchase silk flowers from your local store or follow the previous craft on how to preserve your flowers.
To use your weaving board, weave the flowers’ stems in between the rows of the rubber bands.
This craft activity can work with almost any shape as long the rubber bands can securely stay on the weaving board. So get creative and try out different shaped weaving boards.
Check out more craft activities and things to do!